Thursday, May 26, 2011

SewMamaSew Giveaway Winners

I can't believe I waited so long to post the SMS giveaway winners... Sorry about that folks! So without any further procrastination, here are the winners:
 
Beth said "LOVE the camera strap - the clutch is fabulous too!" Beth has a lovely blog over at The Modern Lady, where she sews and crafts, I would totally recommend popping over and checking her out. Congrats Beth!

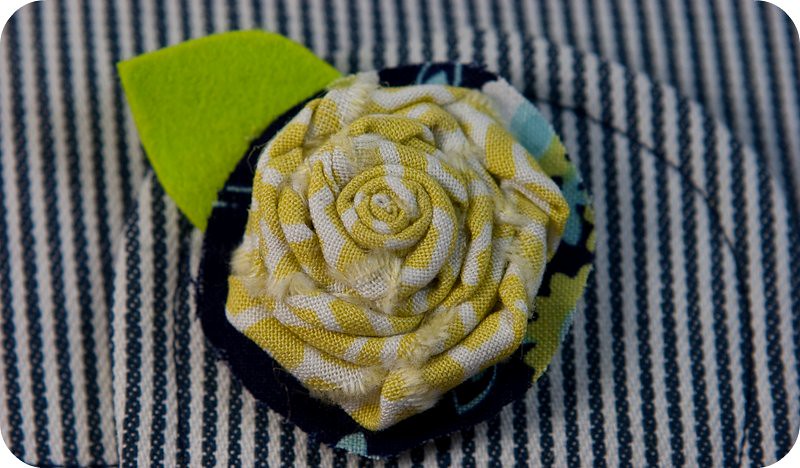
Megan said "Love the flower on the clutch and the material reminds me of the pair of "train engineer's" overalls I used to wear a long (and I mean long) time ago."  That is so funny, I have a picture of me at 3 years old wearing a pair of these too. Megan lives in beautiful Lake Louise, Alberta which is a spectacular place to visit if you ever get a chance. Yay Megan!

Your packages are in the mail, with some added chocolate. I would have liked to have mailed these sooner, but I wanted to wait and see what was happening with the postal strike.

Thank you to everyone who stopped by my blog during the Sew Mama Sew Giveaway week. It is always so exciting to get such wonderful comments from so many people.

Monday, May 23, 2011

Sew Mama Sew Giveaway Day is Here!

 
The Giveaway is now closed. I will be posting the winners as soon as they have been contacted. Thanks to everyone who left such kind comments, I hope to see you all again soon.
 
Happy Giveaway Day! I am sure you are visiting a lot of new crafty blogs today, so thank you very much for stopping by Tiny Apartment Crafts. I am giving away 2 handmade clutches, each with a matching SLR camera strap and a fabric flower pin. Anybody can enter, this giveaway is open to international entries. Winners will be chosen from the comments by random number generator at the end of the day on May 25th and contacted by email as soon as possible. There are no hoops to jump through, but please follow the entry instructions at the bottom of this post carefully so that you don't miss out on your chance to win.

This giveaway was organized by the wonderful people at Sew Mama Sew; click the giveaway button on my sidebar to see a complete list of all the participants.
The clutches were made using the adorable Pocket Clutch pattern from Keyka Lou. I adore her patterns, the unique shapes and the detailed instructions that always work out perfectly. If you are interested in sewing up one of these clutches for yourself, Milky Robot has a 20% discount code here good until May 27! The outside of the clutch is blue and white cotton ticking, decorated with a removable rolled fabric flower pin. I found a cute tutorial for this flower at My Sparkle.
 The inside of the clutch has 2 generous pockets and is lined with some of my favourite Joel Dewberry Modern Meadow print (I even used this print to make my blog banner!). I used a small gold coloured magnetic snap closure, which holds everything very securely. The body of the clutch is double lined with both sew-in woven interfacing and cotton batting so it is very sturdy and holds its shape.
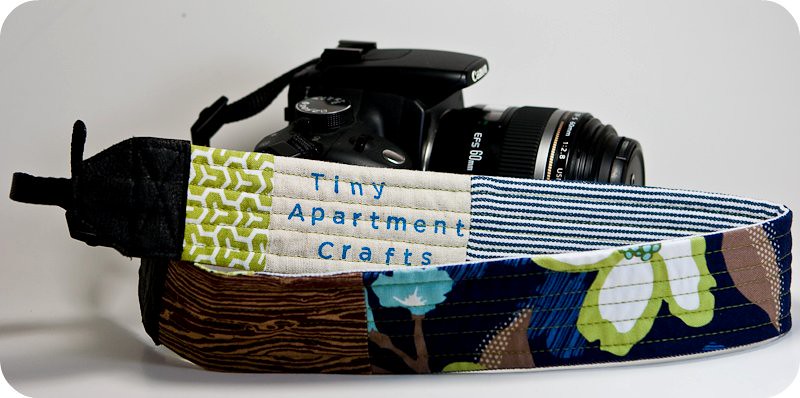
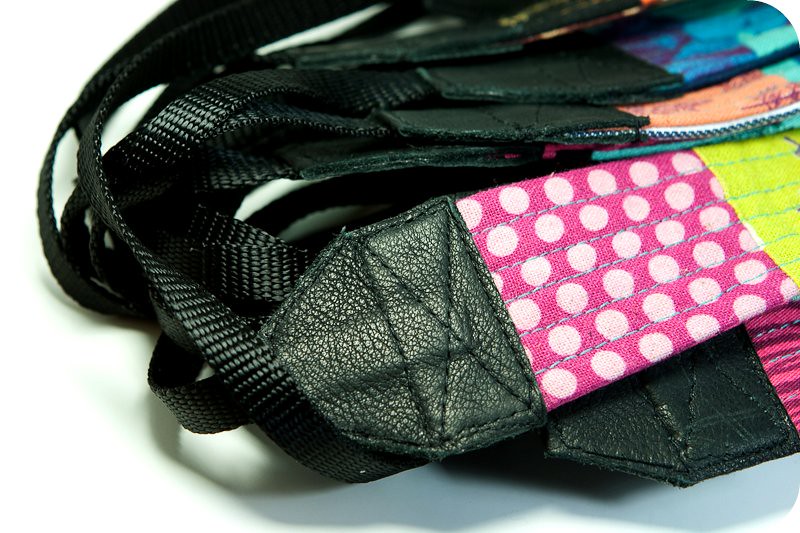
The camera straps are based on a pattern I made from the original Canon strap which came with my Rebel XTi. The cotton strap is 23 inches long and about 1.5 inches wide, quilted with a layer of cotton batting so that is it soft and comfortable. The nylon webbing is 13 inches long and a standard 3/8" width that should fit most SLR-type cameras. To use, just remove the original locking sliders from your old camera strap, slide them onto the new strap and adjust the strap to fit. They are very secure, and the real leather ends have been both glued and stitched in place so that they won't come apart.
If you are interested in making your own custom camera strap, please check out my previous post for more detailed instructions.
Thanks again for visiting and good luck!

PS: Canada Post seems to be threatening to strike on Tuesday May 24th. What terrible timing! If that happens, and it isn't resolved by May 30th, I will contact the winners to let them know of the delay in mailing their goodies. I might also add a little something to their packages to make up for the wait, and I might have a third wild card draw for a surprise gift when the strike ends (if it even happens). So who knows, maybe this unfortunate turn of events could get you an extra present in the mail :)

Thursday, May 19, 2011

Handstamped Labels and Custom Camera Straps

I did some old fashioned typesetting this week! It seems like I have wanted to make some custom labels for myself since the beginning of time. Why didn't I do it before? It is a very rewarding and fast project. I made a whole stack of custom labels, mostly using extra rectangles from this project (I really got carried away cutting rectangles of neutral fabrics - I had about 100 too many). I used a sans-serif clear acrylic stamp set from Martha (of course), to typeset my labels. It was tricky to get the alignment perfect, but I reason the slight irregularities just add personality. It was also tricky to recognize some letters backwards - lowercase "a", I am talking to you.
 I wanted my fabric labels to be permanent and washable, but I didn't have stamp pads meant for fabric, so I decided to make my own. I used Speedball t-shirt screen printing ink, but I think you could use any medium consistency fabric paint you already own with this method. I squeegeed the ink with a smooth edged butter knife into a small piece of acrylic felt. I went over the inked area several times, removing extra ink until I had an evenly saturated, but not gloopy or wet, stamp pad. The ink will go right through in some places to the other side of the felt, so be sure to do this on a piece of cardboard or some tinfoil to protect your workspace. I kept the pad covered with a piece of plastic wrap when I wasn't using it, and I was able to get about 30-40 stamps out of it before I thought it needed replacing/reloading. Making your own stamp pad means you don't have to buy a new craft item you might not use very often, and also, you can mix the colours of fabric paint you have to make any hue you want. I don't think they keep though, I threw mine away after I was finished. When you are done stamping, dry your labels and set them using the ink's directions.
Don't they look nifty? I have to admit, some of them were not as perfect as I would like, but after playing with a real commercial stamp pad later, I think this mainly boils down to technique; my stamping skills are sadly lacking.

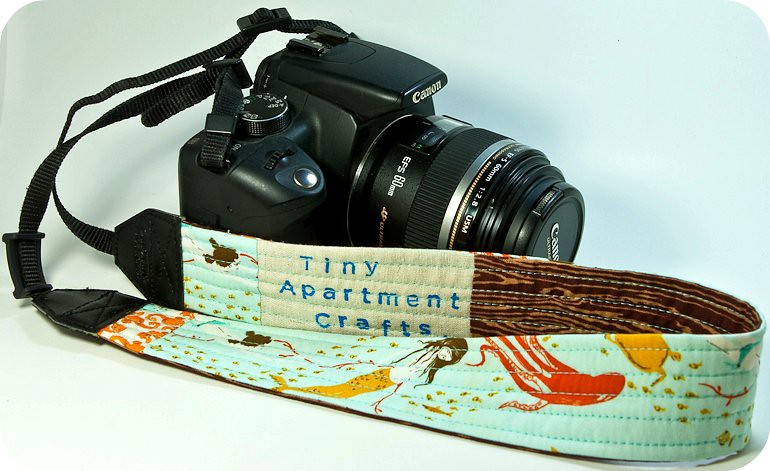
Of course, armed with a stack of freshly minted labels, I had to come up with a fun (and branded!) sewing project to use them in. What did I make? Camera Straps! This one is mine:
I have been saving this pretty Heather Ross print for a special project and the mermaids and sealife swimming across the strap look so cute. The back of the strap is pieced with a label printed in blue on natural linen and some of Joel Dewberry's new woodgrain fabric. My strap is lined with one layer of cotton batting to make it quilted and soft. I followed the basic idea from a camera strap tutorial over at My Sewcial Hour. I picked the stitches from my original camera strap, pried it apart, inserted my new strap into the pleather end pieces and sewed over the original stitching lines....
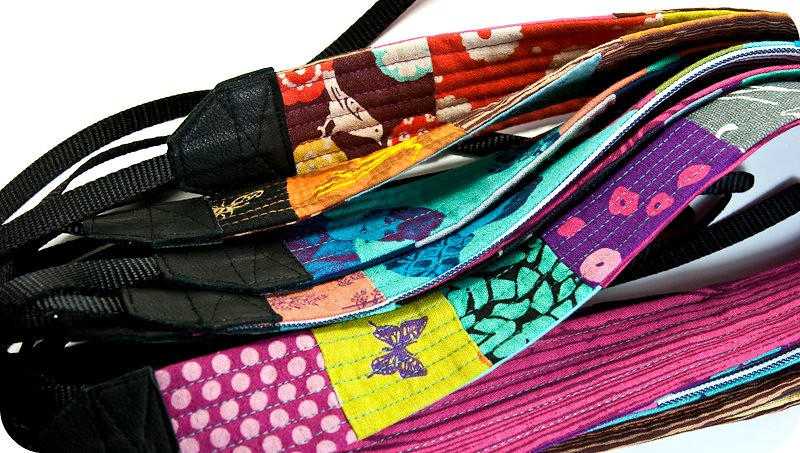
And then I made 10 more! These are pretty addictive to make: quick, pretty patchwork that looks both professional and useful. To make them from scratch, you will need 3/8" nylon webbing, a small piece of leather or vinyl, contact cement, and a leather sewing machine needle. You will also need the proper 3/8" locking sliders, or you could get your friends to use the original hardware from their old straps on their fancy new ones. 

Make your straps however you like, topstitching them to reinforce the strap and keep the seams from rolling. I tried to taper the last inch of the strap ends slightly so that it would tuck into the end pieces neatly. Cut 2 pieces of the webbing to the same lengths as on your original strap, finish one end of each by holding it to a flame. Then use some tracing paper to make a pattern for the leather end piece, placing the narrow end on a fold line. When you cut out your leather (or vinyl) the resulting shape should be like little bow-ties. Cut a center slit to fit your nylon webbing and slide it into the end so that the webbing is 1/4" from the inside edge. Coat the inside of the leather piece and ~1/2" of the end of your handsewn strap (both sides) with contact cement. Let dry about 10 minutes before carefully assembling and pressing everything together tightly. Sew around the edges of the end peice and also sew a box with an "X" that goes over both the webbing and the strap. It is important to sew through all the layers like this so that your new strap is secure and won't ever drop your camera.
I am participating in the Sew Mama Sew Giveaway next week, and I will include some camera straps like these, so if you would like one, please come back on Monday, May 23!

Sunday, May 1, 2011

Pretty {little} Pouch Swap

 
 I made this cute little zippered pouch for my very first secret swap partner. Tomorrow I am going to package it up with a few little surprises and send it off across the globe to its new home. I love the idea that someone right now is making something special for me too... Secret Swaps are like surprise birthdays! It's all very exciting, I think I might be addicted.

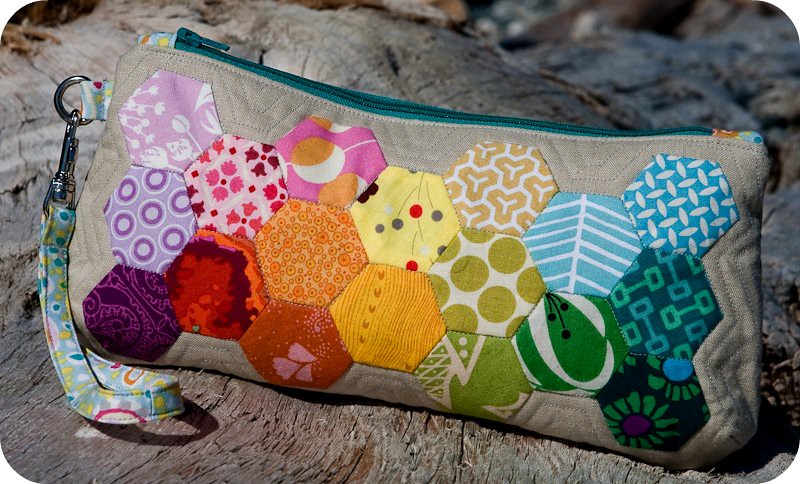
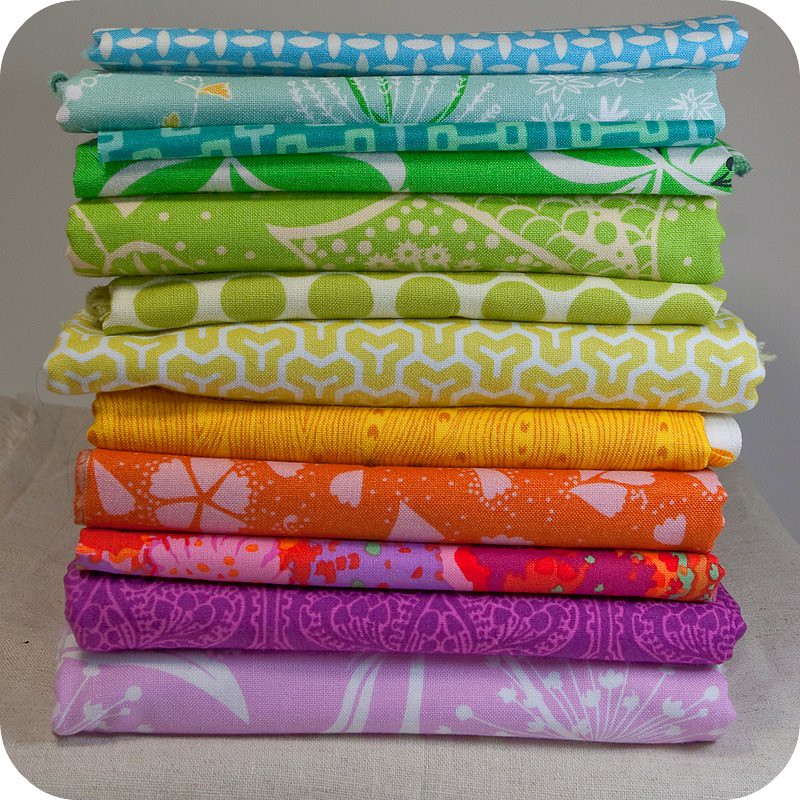
The Pretty {little} Pouch Swap was organized by Michelle Lizcano of I Like Orange, Too! and Kelly from KelbysewsIts a wonderful group, everyone in the swap has been so involved and it is like a storm of inspiration over there. Besides the creative fun, there is also the fun of internet stalking your swap partner and trying to decipher from little snippets of information what they really want. I think that my partner likes rainbow piecing. I'm not really giving away too much saying this because rainbow pieced projects may actually be turning into some sort of internet meme for the quilty/crafty set. I know that they feature heavily in my own Flickr favourites, which sort of surprised me, but who can resist beautiful colours? No one. That's who. I had a really good time pulling fabrics from my stash and arranging them into an attractive ROYGBIV. I had an even better time sewing them together into tiny hexagons.
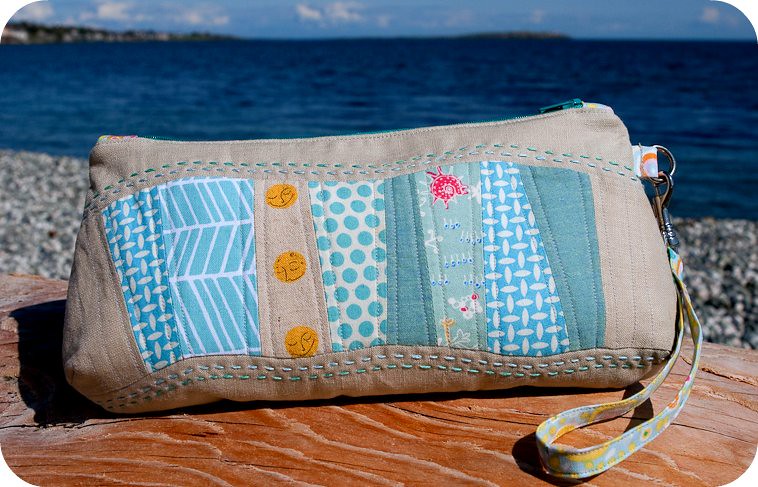
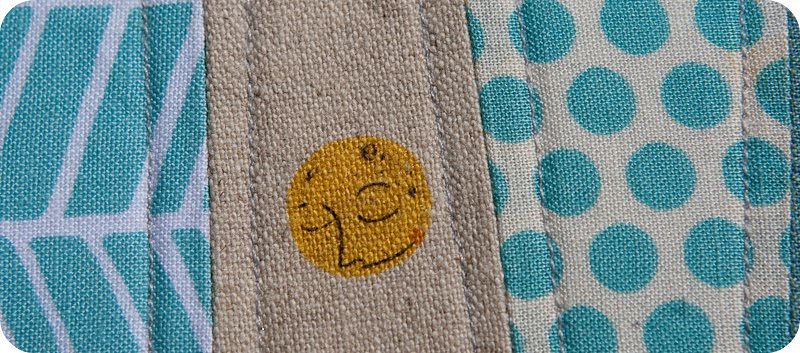
The back of the pouch was inspired by the ocean. I free-pieced the aqua stripe and then cut it into a gentle wave. The tricky part was the curved piecing of the linen strips, but with a lot of pins, it worked out on the first try. I added some rows of handstitches to accentuate the wave pattern. My favourite part of the back are the sleepy moons from Heather Ross's Far Far Away 2.
 The inside of the pouch has a little label (sorry, pictures would give too much away!) which I made using a fine sharpie paint pen and a little square of white muslin. It took a some practice to write on the fabric without pausing and making ugly blobs, but once you get it right, it makes a really lovely permanent label. I found that taping my square of fabric down on a piece of cardboard made writing easier. Then I just folded and ironed all the raw edges to the back and sewed it to my lining fabric. If you were in a hurry (or if you forgot to make a label before your project was finished) you could use a little row of steam-a-seam tape instead.

The sun seems to finally be making regular appearances in the sky nowadays, hopefully this will lead to more pretty beach photos. Happy belated spring everybody :)

Wednesday, April 6, 2011

April Craftbook Challenge: Zigzag Quilted Cushions

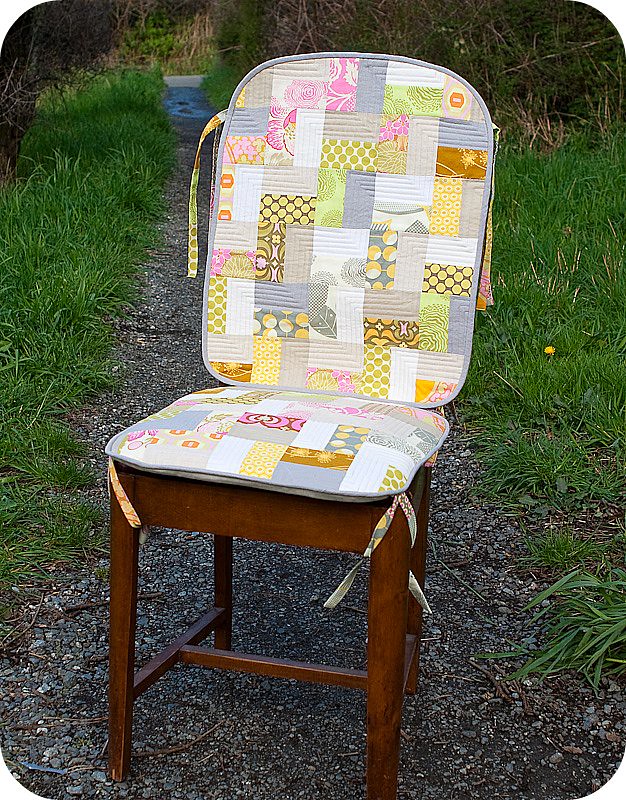
This week I have been busy making some chair cushions for my mom's wicker rocking chair. I think they came out really nicely and I wanted to share them with you. While I was visiting her I used 2 big pieces of newspaper to make my templates, and traced the shape of the chair back and seat onto them. I also marked on the newsprint where I wanted the ties to go, 2 at the top for the chair back, and all 4 corners on the chair seat cushion. Then I took my newspaper home and started looking for a great pattern.
 
I wanted my chair cushions to coordinate with quilt I had made my mom before, so I dug out all my leftover scraps of Midwest Modern from that project, and added a few coordinating prints and some neutral solids to fill in the gaps. Her quilt was very geometric and modern so I was looking for something similar.

I decided to adapt the pattern for the ZigZag pillow from Malka Dubraswky's Fresh Quilting. If you haven't seen this book yet, it is filled with all sorts of great projects and I would really recommend it to anyone interested in trying quilting and looking for some modern, colourful inspiration. I was also really inspired by the neutrals in this baby quilt by Red Pepper Quilts, based on the same pattern.
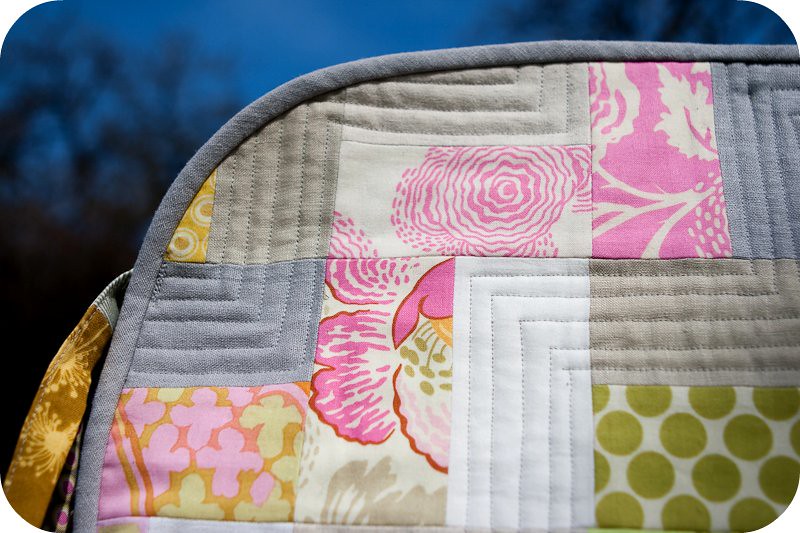
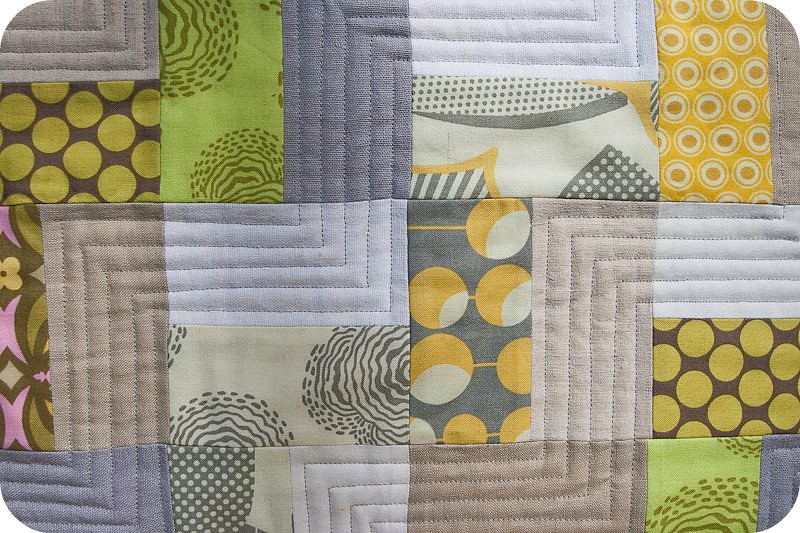
This pattern is really fun to put together. The blocks are all perfect squares, made up of one print and one solid rectangle, and the pattern emerges when you alternate the direction of each block. I really like Malka's suggestion of using close parallel lines of quilting to accentuate the zigzag pattern, so that's what I went with. I made each quilt top a little bigger than my templates and them trimmed them down to size. I used all the extra rectangles that I had cut up to make pieced ties.
The seat back is just a mini quilt, bound with grey linen and backed with natural linen/cotton blend. The seat cushion was quilted, and then sewn to a two piece back with a lapped zipper. I made my own cording with the same grey linen cut on the bias. The cushion itself is 1 inch thick foam. They don't really fit on my little antique chair, but they will look perfect on the wicker rocker.

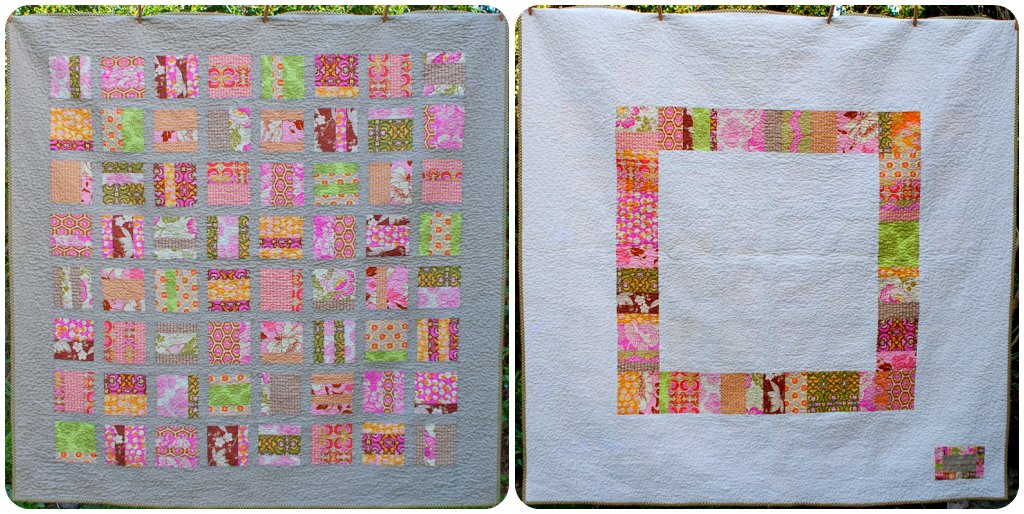
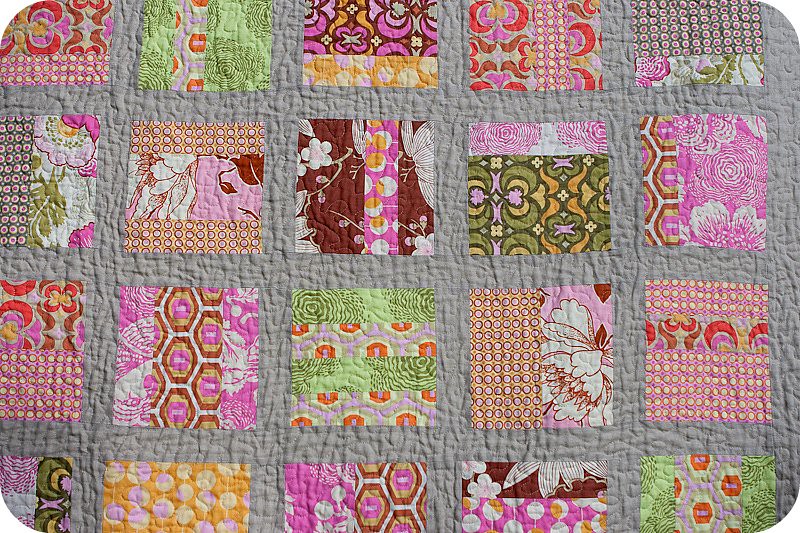
Here is a peek at the quilt that I made my mom last year:
The pattern for the quilt top is Mixed Tape from Elizabeth Hartman of Oh Fransson! I used a big stack of Amy Butler Midwest Modern that I had been hoarding, along with lots of natural linen for the sashing. The backing was my own improvised design; I used all the extra rectangles from making the pattern blocks and pieced them into a huge square. This was my very first try at free motion quilting, and I chose to use a stippling pattern which turned out pretty well. Elizabeth has a whole series of tutorials on quilt-making basics which I found really helpful.
I think that the Mixed Tape Quilt and the ZigZag Pillow may be two of my favourite quilting patterns. I love their simplicity, mix of solids and pattern, and how they show off your fabulous prints. Do you have a favourite modern quilt pattern? I would love to hear about it and why you loved it.

Sunday, March 27, 2011

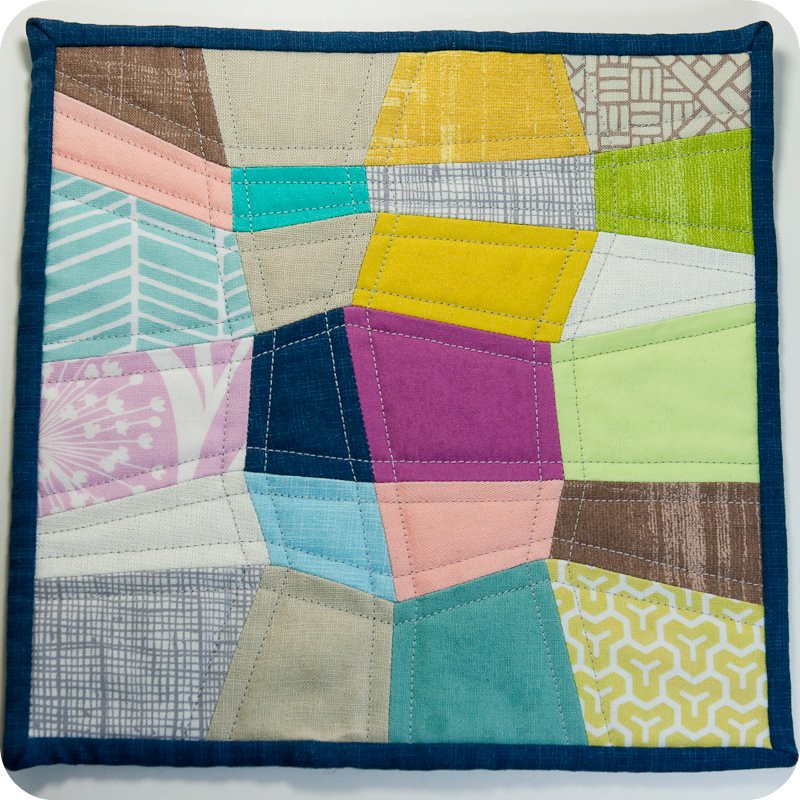
Mini Quadrilateral Quilt and Tutorial

Okay Mug Rug Madness, you got me. I had never before seen the point of making a tiny beautiful patchwork quilt and then hiding it (and/or risking its life) under a cup of tea. That is, not until I came up with a quilt project idea that I would need to test out on a smaller scale first. Now I get it: a quick and easy way to try out new and possibly daunting techniques, to try unexpected colour combinations or to just play around with your scraps. Yay Mug Rugs! Thanks to Erin over at Two More Seconds, I might be hooked.

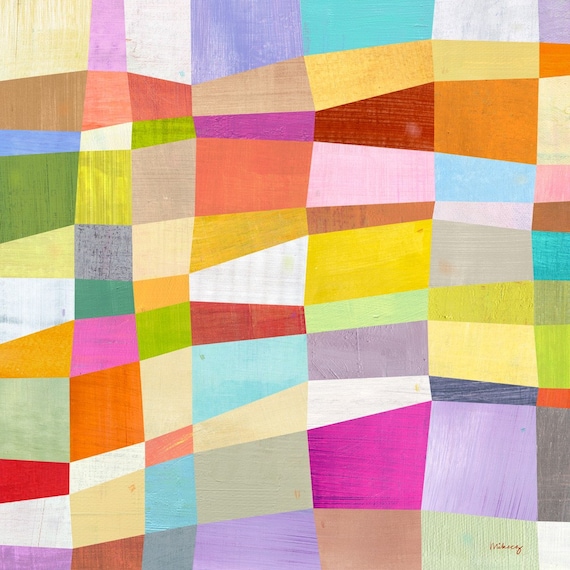
The inspiration for my miniquilt (and the large scale quilt which as of yet lives only in my dreams) comes from this gorgeous modern print I found while perusing Etsy the other day.
Block Abstract Art Print by Melanie Mikecz of twoems 

Melanie's palette choice of bright saturated hues combined with neutrals, and the colour blocks in the design reminded me so much of everything I love about modern quilts. In fact, a lot of her prints look like they would make amazing modern quilt projects. They are so inspiring, you should really go take a peek. At first glance, I thought that I could achieve this look with improvisational piecing, but then I noticed that each quadrilateral colour block intersects at a single point and I would need to make a pattern. I also realized that sewing the rows of blocks together would require use of the dreaded Y-seam, which is why I tried a tiny version of this before committing to a huge quilt.

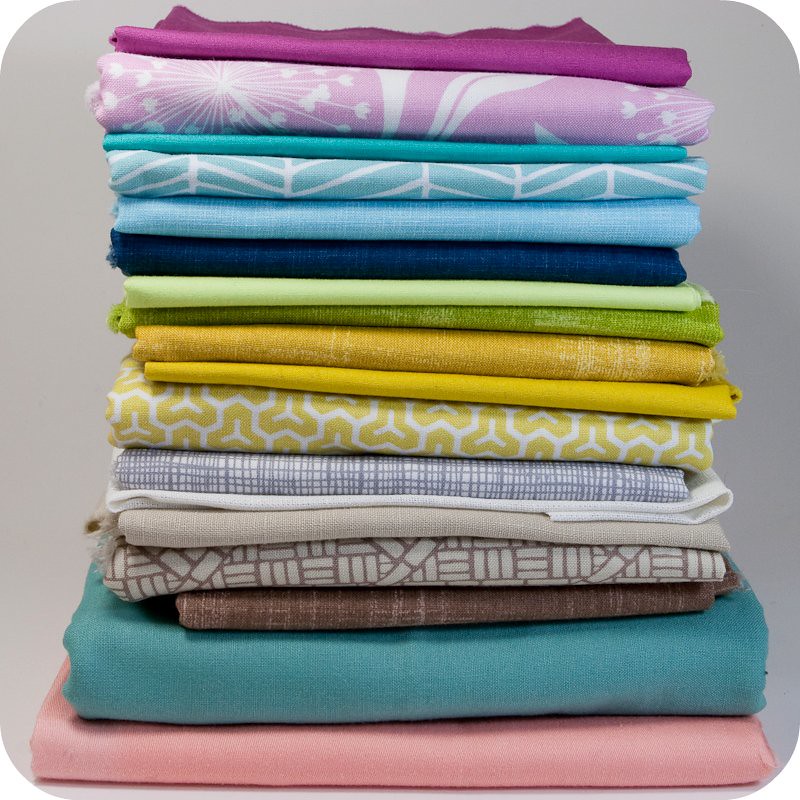
Choosing the fabrics for this project was a lot of fun. Are you a fan of the blog In Color Order? Well you should be. Jeni's series on The Art of Choosing has really helped me to develop an eye for how to use the fabrics in my stash. I decided that I wanted a palette of neutrals and cool colours, with a few hits of bright pink and yellow for contrast. I also chose to use only solids and colours+white to keep the focus on the geometric quality of the design.

The solids were a combination of natural and white linens, Laura Gunn's Magnolia Lane, Robert Kaufman's Quilters Linen and Pat Bravo's Pure Elements. The prints were from Alexander Henry, Joel Dewberry and Kate Spain. I also used a medium weight turquoise woven, and a lighter weight peach cotton sateen from my stash of fashion fabric.

For my pattern, I measured an 8" square onto the papery side of some freezer paper and added a 1/4" seam allowance around all 4 sides of the large square. Then I took a little ruler and started making 4 sided shapes with intersecting points to fill the square. You really can't go wrong here, but I tried to vary the width of the rows as well as the angles of each shape. Basically, the wonkier your quadrilateral shapes, the better. Number all the pieces, with your numbers facing the same way up so that you will be able to fit it all together again (underline your 6's and 9's!!). After I had carefully cut them all apart, I came up with the idea of drawing some horizontal lines on the pattern to indicate the direction of grain, so you might want to try that too. I just aligned the pattern pieces on the fabric grain as best as I could guess.

I wanted to ensure an element of randomness, so that the colour placement didn't get too fussy and predictable. To achieve this, after I cut out all the shapes, I put them in the randomizer (or "bowl" as some people call it) and then sat at my ironing board, with my stack of fabrics, choosing a piece at random from the bowl and ironing it to the wrong side of whatever fabric came next in the stack. When I had run out of fabrics in my original stack, I picked out all the neutrals and made a new stack, and repeated the process until I had ran out of pattern pieces. This is a variation on the theme of the Paper Bag method devised by the queen of improvisational quilting, Denyse Schmidt. Of course, as supreme ruler of your own quilting universe, you have the power to veto anything the randomizer chooses that you really dislike.
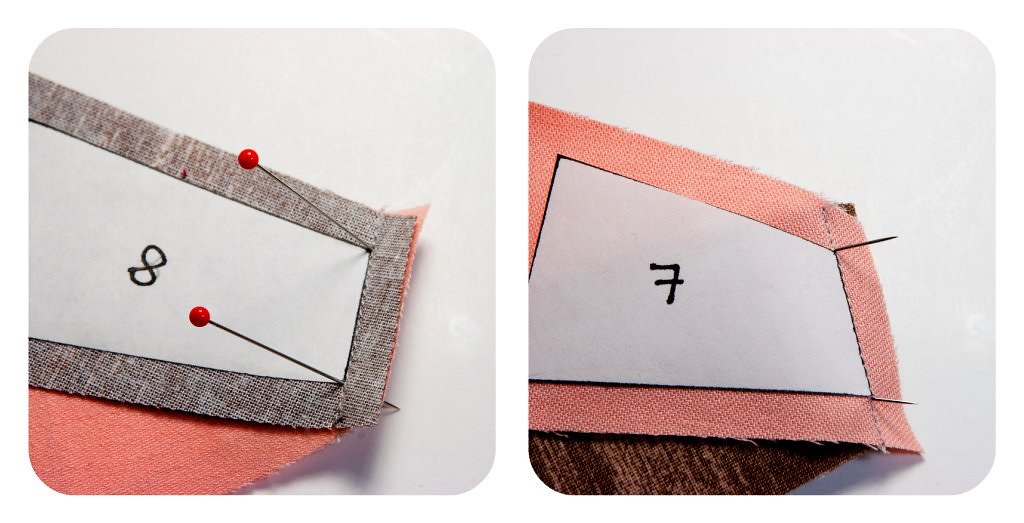
After ironing the pattern pieces to my fabric I trimmed each piece to include a 1/4" seam allowance around all sides (except where the edge seam allowance was already included) with my rotary cutter. Being really careful in this step makes everything easier to line up later. I left the paper patterns on for the whole sewing process to help make sure I was sewing accurately and then ripped them out gently at the end. How you choose to sew your Y-seams will affect how you proceed to the next step. There are a lot of schools of thought on this, and lots of online tutorials and videos to help you out; this was my first time trying to sew a Y-seam with my machine so if you know a better way, go with your gut.

I chose to align each pair and chain piece them, sewing the seam through each seam allowance. I used my 1/4" foot to make piecing faster and more accurate. When aligning the pieces, I poked a pin through the fabric at each corner to be sure that they were lined up properly. It is trickier to get these right than you would assume due to all the funky angles so I checked each one individually to be sure. (I forgot to take a picture of this, so in the photo below, they are already sewn together). Press open the seams and then attach all the pairs to make complete rows. Press again, although not too enthusiastically, you don't want to steam them or distort them too much.I tried unsuccessfully to get a picture of how I sewed my Y-seams together. Please accept my apologies and watch this helpful video from videojug instead. Sew each matching side together, stopping at the center of each seam, then rotate the top row to line up the next pair of matching sides and sew again. Repeat this process of matching up seams and rotating the row until you reach the end. Again, it is helpful to poke a pin through the seam to check that it comes out at the same point on the other piece. I rotated the top row with the sewing machine needle down in the center seam, and I found that the fabric aligned smoothly.
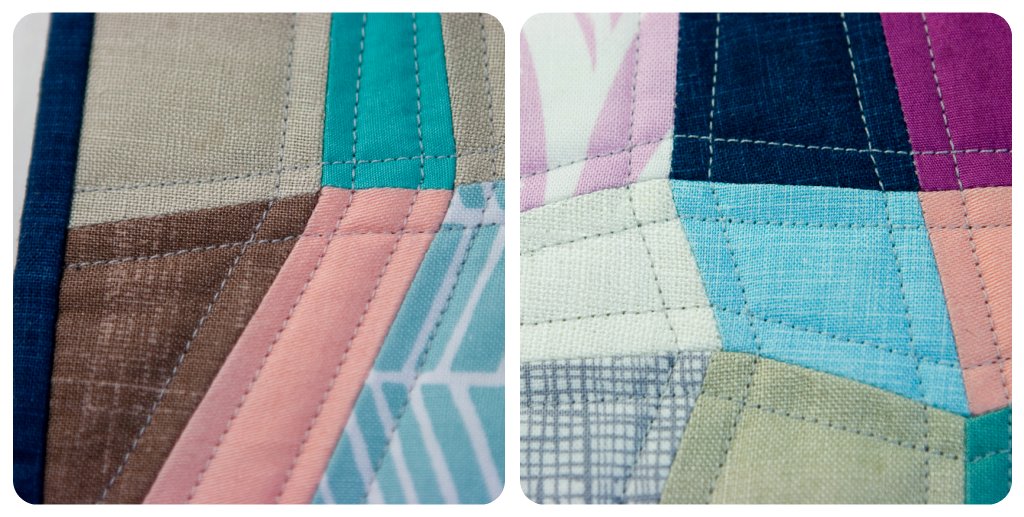
 Look how neatly some of my points line up! A few seams were off by a millimeter or so, but the finished block lies flat and with no waves or wrinkles so I was pretty happy with my first attempt at sewing Y-seams on my machine. I backed my mini-quilt with the beige linen, and used the dark blue quilters linen for the binding. I had a tough time deciding how to quilt this, but eventually went with a light grey thread and my walking foot to make parallel lines of stitching along all the seams. I think it accentuates the geometric pattern perfectly.
And now the obligatory pretty mug rug shot with my cute little cupcake mug from Momiji. I love my little mug, my mom got it for me for my birthday years ago and it always makes me smile when I use it.

So the goal now is to try to translate this project into a full size quilt (or maybe a lap quilt?). Making the full size pattern might be challenging, but I think it is still doable. I am not sure how I would quilt a larger version. I like my quilting pretty dense, so maybe alternating directions of close parallel lines in each block, or even an angular spiral within some of the blocks will accentuate the overall design.

Did any of you make mug rugs for Mug Rug Madness? I would love to hear about your inspiration. I hope some of you try making a cute little quadrilateral quilt like this, it was a great way to practice a tricky skill, and it makes a really modern and spectacular looking block.

Sunday, March 20, 2011

Pattern Review: Family Tree from CozyBlue

Update: Pattern is now for sale in CozyBlue's Etsy Shop!

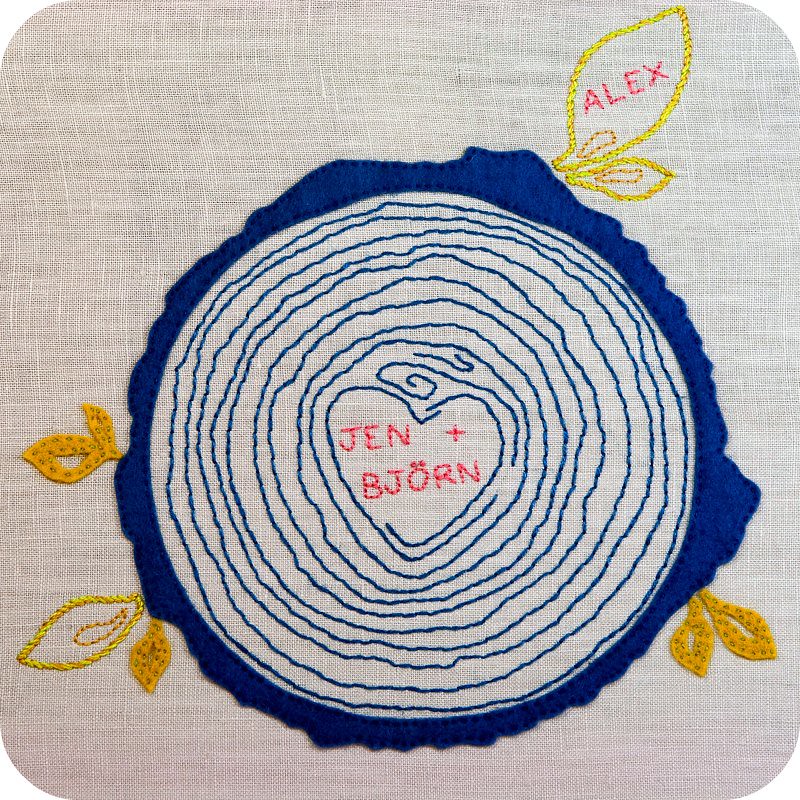
When Liz from CozyBlue asked me if I would like a free review copy of an embroidery pattern she was developing based on her custom screenprints I jumped at the chance. I had seen her screenprinted family trees before and I really love them. They are the perfect modern family tree. The design is fresh and striking, I love the clean lines, and that little heart at the center of the tree rings is adorable. These family trees would make wonderful presents for Mother's Day, or for the nursery of a new baby. I made mine for a good friend, as a housewarming present for her new home.

Liz did a really good job with her instructions for transferring the pattern to both light and dark material, and the pattern includes different shapes and sizes of extra leaves, so you can customize your tree however you like. The design is almost fool proof, all the lines are slightly irregular, so even if you make a minor mistake with your stitching, nobody will ever know the difference. Depending on how much extra embellishing you want to add to your family tree, I think this is a weekend project for most crafty people, from transferring the design to framing. 
I really loved the indigo and greenish yellow that Liz used in her print so I kept the colours the same in my project. I have been really inspired by the work of Melissa Crowe and that is where I got the idea to add some felt applique for both added texture and solid colour. If you would like to do the same, I traced the original pattern onto the matte side of some freezer paper, lightly ironed the paper shiny side down onto my felt and then I was able to cut out the pieces easily and accurately. After removing the freezer paper, you can flip the felt pieces upside down and lightly spray them with spray adhesive so that they stay in place while you stitch them down. I used tiny running stitches with a single strand of embroidery thread to hold the felt in place.

Some of my favourite parts: I really love the tiny little french knot umlauts, the perfect little yellow leaves and the tiny stitches in the felt bark. I also love how the concentric rings of backstitching look, leading to the little knot and heart in the center of the log. It was very soothing and hypnotic stitching these rings, turning the piece around and around in my hands as I went.
To frame the finished family tree, I stretched the linen over a 10" square wooden canvas. I think it would look just as good framed in a 12" embroidery hoop. The only problem I had with this pattern is that people with very long names might find it difficult to fit them into the limited center space in the design. I think it would be relatively easy to work around this using a copier to enlarge either the whole design, or just increase the center heart design and eliminate one or two growth rings to make room for the larger center.

Liz is planning to have the pattern available in her shop in the next two weeks, but in the mean time she has lots of other cute stuff available, including all sorts of customizable family tree prints, heart pillows, and adorable welcome baby prints with fabric bunting. Check it out at http://www.cozyblue.etsy.com/

Thursday, March 17, 2011

Happy St. Patrick's Day

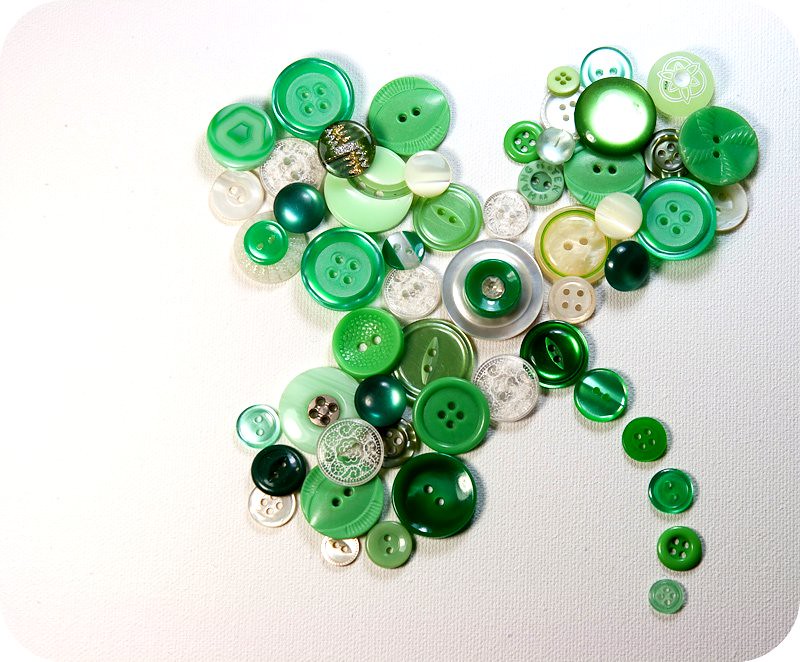
Here is a little peak at my vintage button stash; I pulled out all the pretty greens and a few pearly shell and lacy translucent buttons too. My favourite of the bunch is the little green button with a rhinestone center. I like to imagine that it came off of a kelly green 50's cardigan worn by some elegant red haired beauty.

I don't have any Irish heritage, but growing up St. Patrick's day was celebrated in our house with much enthusiasm. My mom would make all of our food green, which was that special mix of gross and tasty that little kids love. There was a lot of green food colouring involved, some vegetables and lime jello for dessert of course. Nothing about drinking limeade and eating kiwis and avocados for breakfast have anything to do with being Irish, but it was a lot of silly fun, and they are really happy memories.

I hope today you take a moment to think of something from your own past to make you smile. I know we all could use some cheering up. Trying to help in any way we can makes a difference too. I've sent in my donation to the Canadian Red Cross to help with the Japan earthquake/tsunami relief, have you?


And now for something completely different:
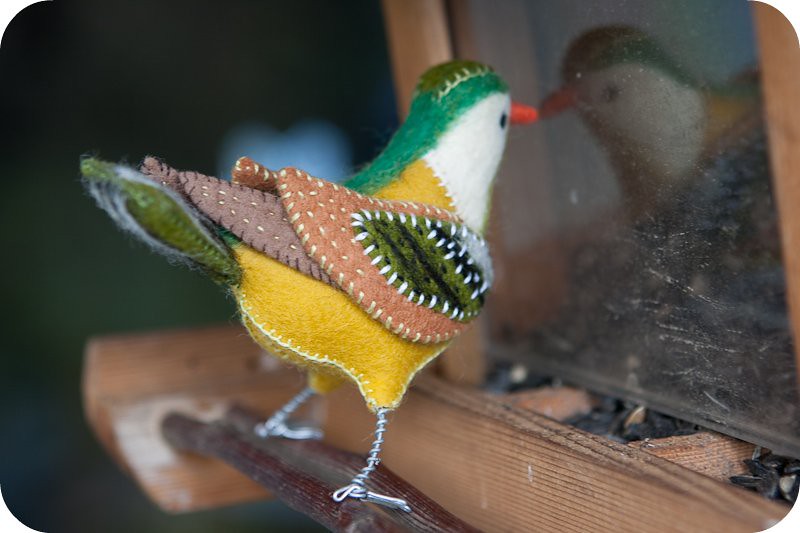
Green Bird is tempted by the sunflower aroma wafting out of his favorite cafe...

Thursday, March 10, 2011

Retro Oilcloth Shopping Bag

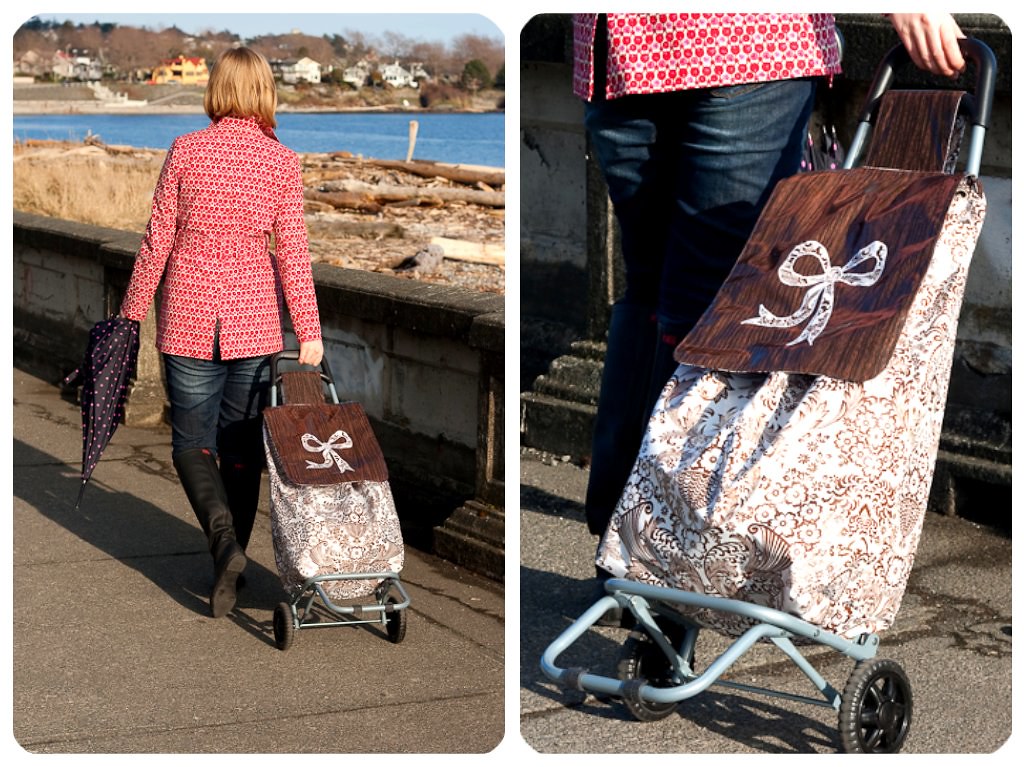
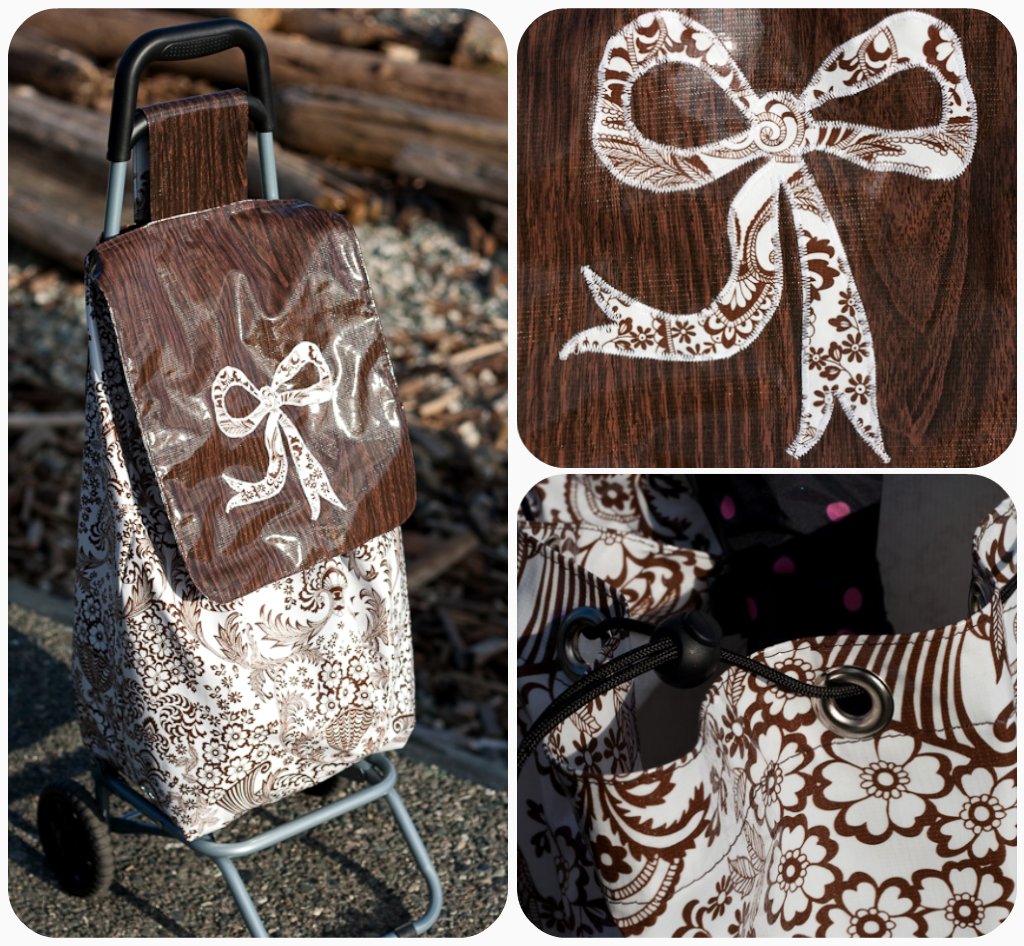
It's not all arts and crafts in the Tiny Apartment, sometimes I make the useful things that people in my life need help with. Still, I like to make practical things as pretty as I can manage, don't you? My sister wanted an upgrade for her wheeled shopping cart bag. The one which came on the frame was made from the cheapest polyester canvas-type material, it was black, ugly, flimsy and poorly designed. We went shopping for some oilcloth and had a lot of fun deciding which retro print to choose for its replacement. Oilcloth was the perfect choice because it is sturdy, needs no lining or interfacing to give the bag body, and is waterproof, which means my sisters groceries will arrive home safe and sound. In the end she settled on a very pretty brown and white traditional print of flowers and baskets, and a cool faux bois wood in dark brown.

I copied the basic pattern for the shape of the bag from the original, adding a more generous flap over the opening, velcro closures for the flap at two positions, so that the lid stays in place even when full (did I mention it rains a lot here on Vancouver Island?), grommets at the top to help the drawstring closure work smoothly, and a zippered pocket at the back.
After sewing this and a few other oilcloth projects I have some pointers for those interested in using this great material for the first time:
  • Wrinkles: lay your oilcloth open flat for a couple of hours in a warm room, or if you are in a rush, use a warm hairdryer at a distance of at least a foot to coerce it to flatten out.
  • Oilcloth doesn't like irons! Finger press, or use the smooth edge of a spoon to press open seams or crease folds. Really, put away the iron, you will have only yourself to blame for the mess created by thinking that you could use a lower setting or a pressing cloth and then melting your project onto your iron.
  • A Teflon foot really helps. Oilcloth is slightly tacky so if you don't have a Teflon foot, you can use masking tape on the bottom of your foot to help your project go smoothly.
  • Use a long stitch length (I set my machine to about 2mm) which is less likely to cause rips.
  • Pin your project only in the seam allowance, or better yet, use binder clips to hold everything in place, as pins will permanently mark oilcloth.
  • For the bow applique, I used some adhesive spray to hold it in place (remember, no pins!), and then zigzagged over the edges.
  • In order to reinforce the seams, which could be stressed by heavy loads, I used french seams to sew together the body of the shopping bag.
  • When you are designing your project, remember that oilcloth doesn't fray, so you can simplify a lot of designs that would require a finished seam if you were sewing with a woven material.
If you have never sewn anything with a french seam, give it a try! The first time I attempted it, it felt funny sewing everything right sides out, but when you are done, you have a strong, clean finish inside. It is a great way to make laundry/shopping bags or little bags for organizing things in your home. Remember to add extra seam allowance to your projects if you use a french seam, as it eats up extra fabric. There is a great tutorial for making simple linen drawstring bags with french seams over at Between the Lines if you are interested in trying it out yourself.

Saturday, March 5, 2011

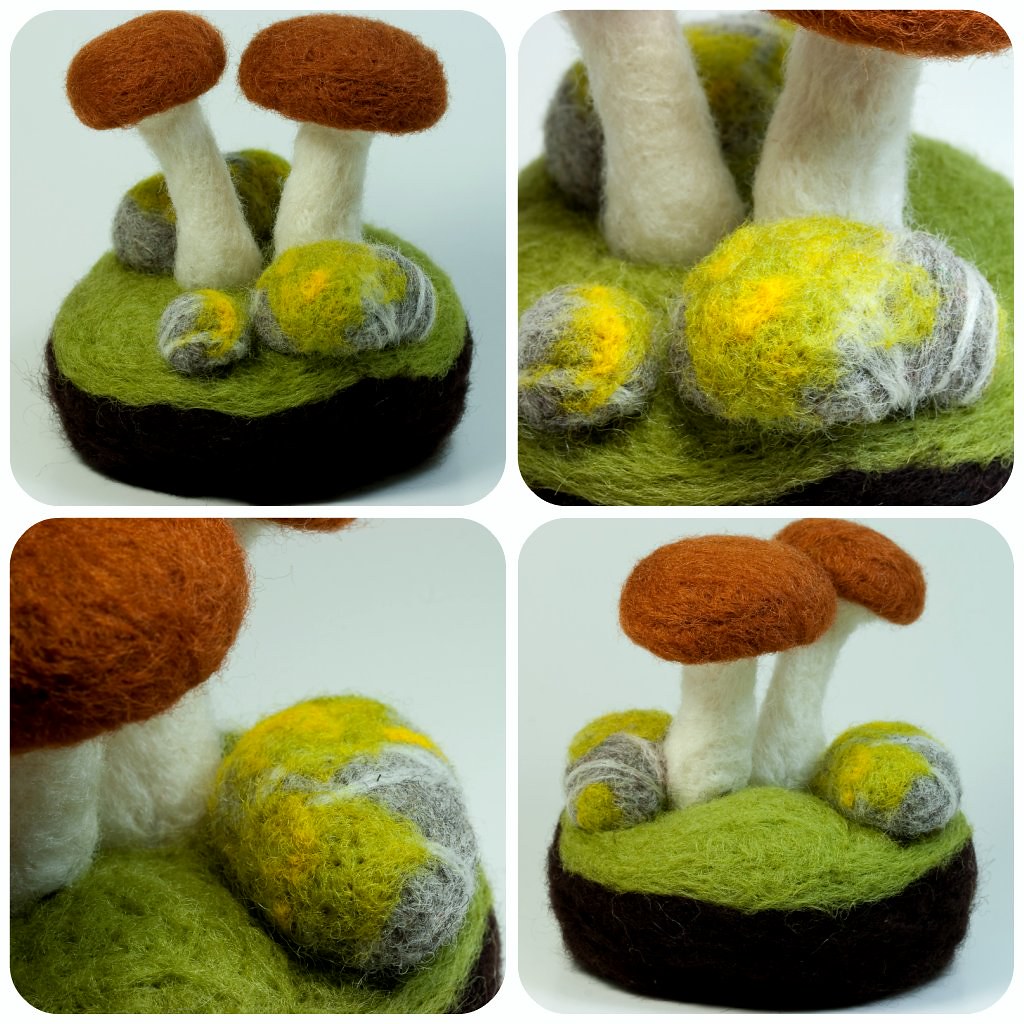
Felted Brown Mushrooms and Lichen Covered Rocks

I am working on another small terrarium. The inspiration for this one comes from hiking in the dry open forests of the Gulf Islands. There is not a lot of rainfall in the summer and the forest floor is covered with moss and beautiful lichens. When the first real rain comes in the fall we go on mushrooming expeditions. My favourite wild mushrooms to eat are the Chanterelles, but the smooth rusty brown-capped Bolete mushrooms are always exciting to find. If you would like to try making these little brown mushrooms, check out my needlefelted mushroom tuturial!

My favourite mushrooming field guide is All That The Rain Promises and More... by David Arora. The book is small enough to fit into your jacket pocket, is filled with wonderful photos, and is really easy to use. The best thing is that while it is not a complete compendium of every mushroom species known to man, it has all the really tasty mushrooms you want to look for, and very carefully compares and contrasts these with any local mushroom "lookalikes" which are actually poisonous. The book is also filled with hilarious stories, interesting recipes and poems. It is very unique and I think it appeals to the quirky people who run about the woods on their hands and knees searching for elusive and delicious fungi.

I know that fall is long way away, but don't forget that those elusive Morels come up in the spring! 

**If you have never been mushrooming before, it is wise to go with a more experienced buddy, or join a local mycology society. I have been hunting mushrooms since I was a child but if I am ever less than 100% sure of my identification, I leave it behind.

Friday, March 4, 2011

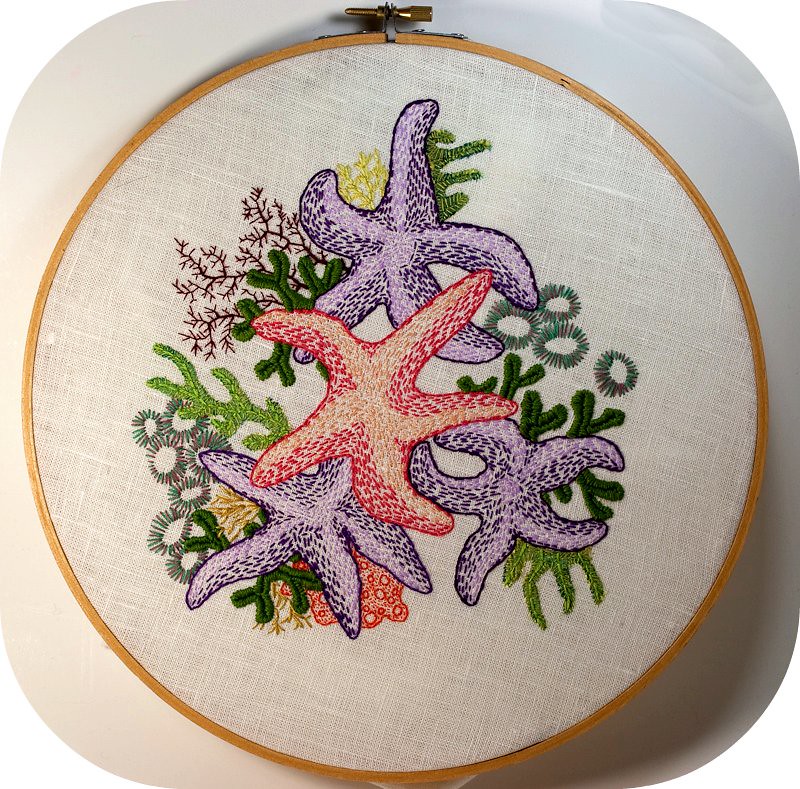
Intertidal Embroidery Project - WIP

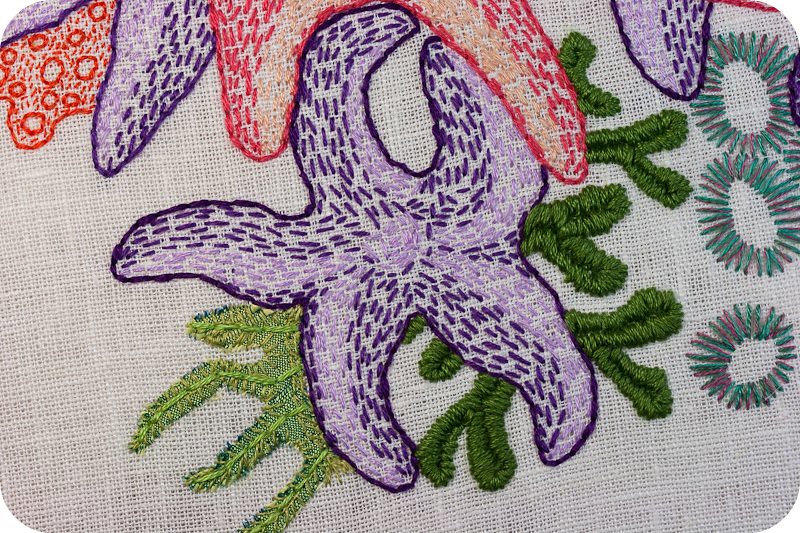
I have been working for a while now on an embroidery piece inspired by the tidepools surrounding the rocky beaches of Southern Vancouver Island. It isn't really a finished work, I feel like it is more of an embroidered sketchbook for a future project. I am using cotton embroidery thread on white linen, with a little silk applique. Above is a Purple Ochre Star, which is the most common starfish where I live. Depending on what part of the coast you live on, Ochre Stars will vary in colour from the deepest purple, to bright pink and orange. The purple variety is the most common here, but in every large pool there are a few salmon pink sea stars too.

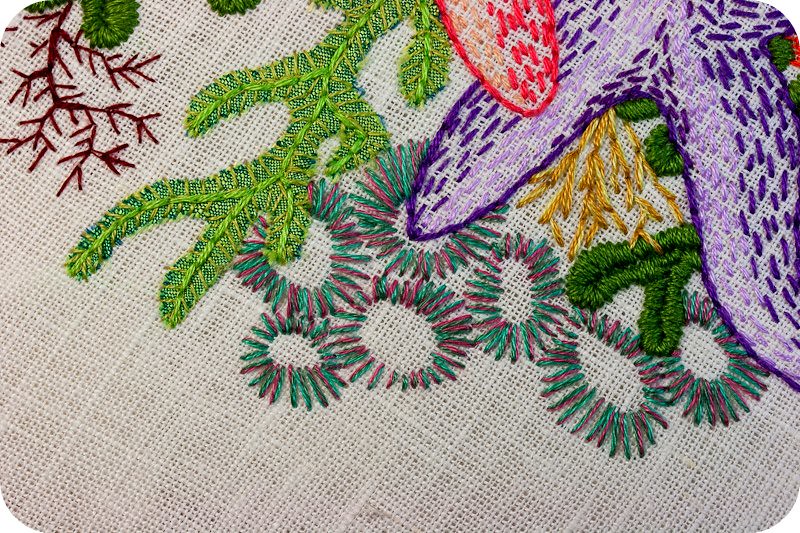
One of my favourite things are the sea anemonies. Even though my first instinct is to make things really challenging and complicated, I am always most impressed with artists that are able to use very simple shapes and effortless looking styles to say more. I wanted to show the way the anemonies aggregate and squish together without being too fussy. I really am in love with their irregular oval shapes, made with just radiating straight stitches.
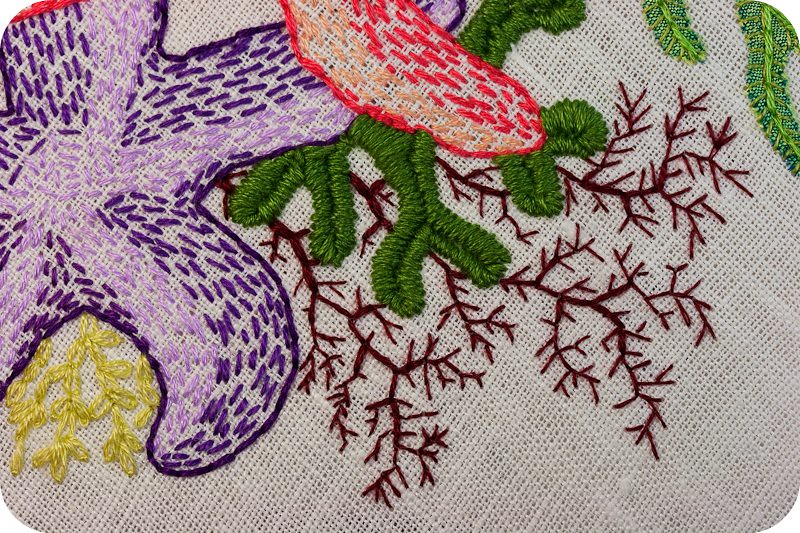
I added some bright green silk applique and heavy satin stitching to make green algae. I also really like the feathery red algae, and it is very easy to get carried away sewing the branching fronds with finer and finer thread.

I am still trying to figure out the best way to make embroidered barnacles. I think that they would look best done in white or light grey on a darker background like navy blue. I would love to see all their angular shapes, like living prisms, feeding with their feathery appendages.

The part of this project that has me stuck is how to execute the embroidery composition so that it looks modern, unfussy and striking. What I have right now is a jumble of things tangled together, which is how they live in real tidepools, but in my opinion is not the most effective presentation. I think that embroidery can be a very modern feeling medium, but you have to be careful with its treatment to do so. I really want to be sure that this project doesn't tread into stuffy "embroidery sampler" territory.
I am thinking about making 3 or 4 small pieces, each with only one or maybe two different species, but linked by style or by how they are framed. I think it might be make them feel more modern to frame them simply in their hoops. What do you think?

Sunday, February 27, 2011

"Shoelace" Stitch - mini handsewing tutorial

I decided I could do a better job explaining the handsewing technique that I was trying to tell you about in my last post so here is a little mini-tutorial in case you would like to try it. In my example above I have used a contrasting 6 stranded embroidery thread just so everything shows up nicely. You would want to use a closely matching, strong sewing thread in your real work.
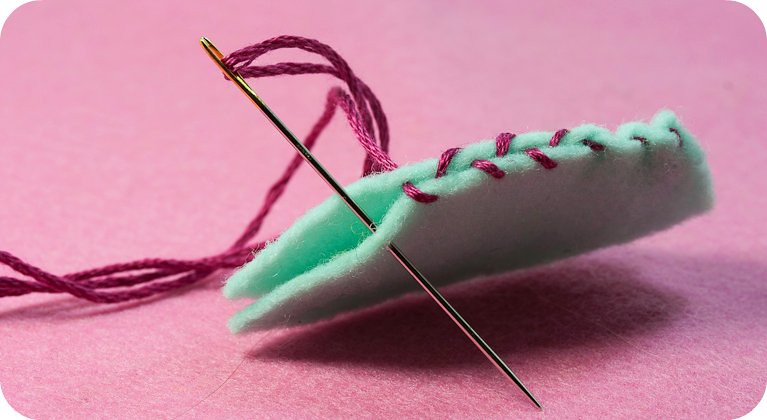
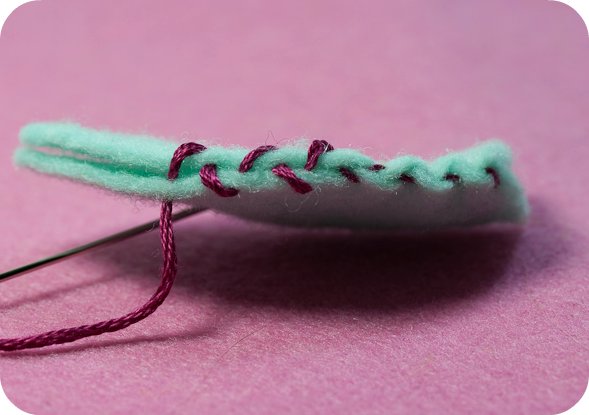
As you can see above, the needle is inserted into the felt from the inside of the seam into one side and then from the inside of the seam to the other side, each time moving forwards a few millimeters and alternating directions. When you pull the thread tight the stitches bite into the felt and become almost invisible. I tend to sew about a half of an inch or so and then pull the thread tight, then sew another half inch, tightening my stitches as I go. Below you can see the untightened stitches on the left, and on the right are stitches which have been pulled tight.
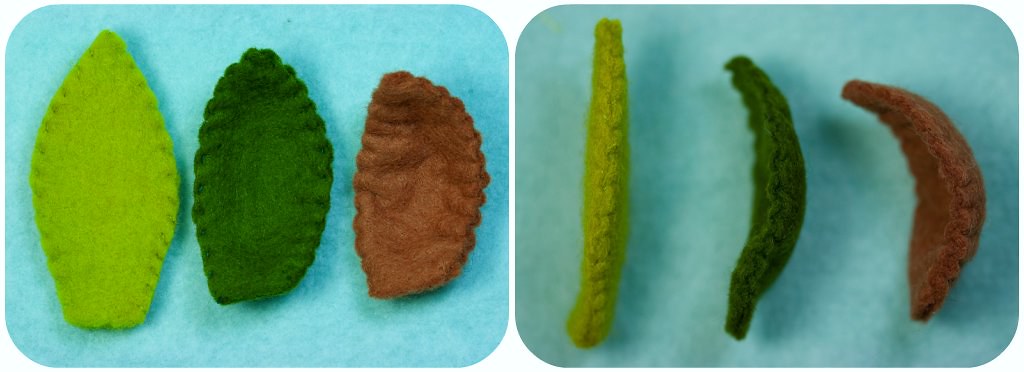
Gently pulling the stitches will result in leaves that look slightly notched. Pull the thread tighter, and you get distinctly notched leaves that curve outwards. Pull very tight, more on one side of a leaf than the other, and you get leaves that twist and bend (pull the thread too tight, and it will snap and you will have to stomp your feet and start over). It is a great way to add simple three dimensional shape to a plant. Also, the thread seems to disappear into the felt, but without crushing the outer shape the way that blanket or overcast stitches seem to do when they are pulled tightly. To help shape the leaf the way you want, sometimes you can take the leaf and tug on the shape slightly to redistribute the gathers you have made.
 
 Above are three leaves that I have stitched using this technique. Each leaf started exactly the same shape and size. By tightening and gathering the stitches you are able to make progressively more curved leaves. If you find that you aren't able to tighten the stitches easily and want a more curved leaf, you might have to try spacing your stitches out a little more.

You could use leaves like this to build your own succulent felt plant, or you could pair a leaf with a felt flower to make a pretty pin or clip. If anybody knows the real name for this stitch I would love to find out. 

Friday, February 25, 2011

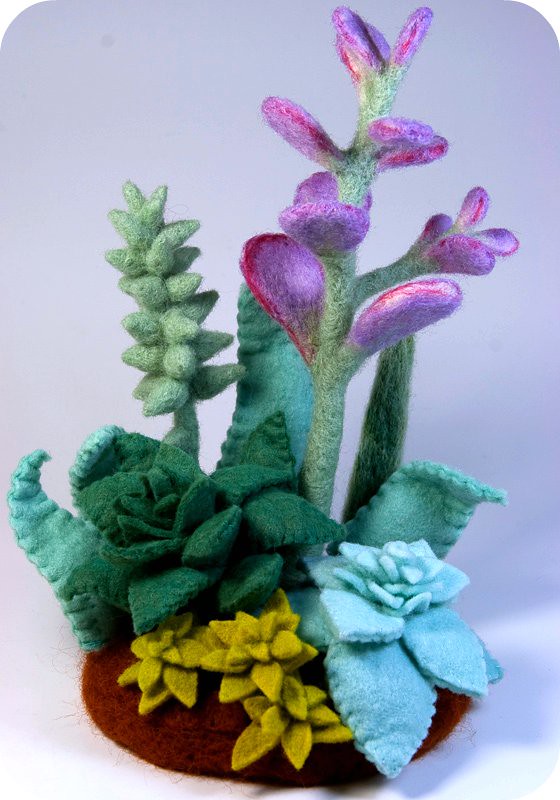
Needle Felted Succulent Terrarium

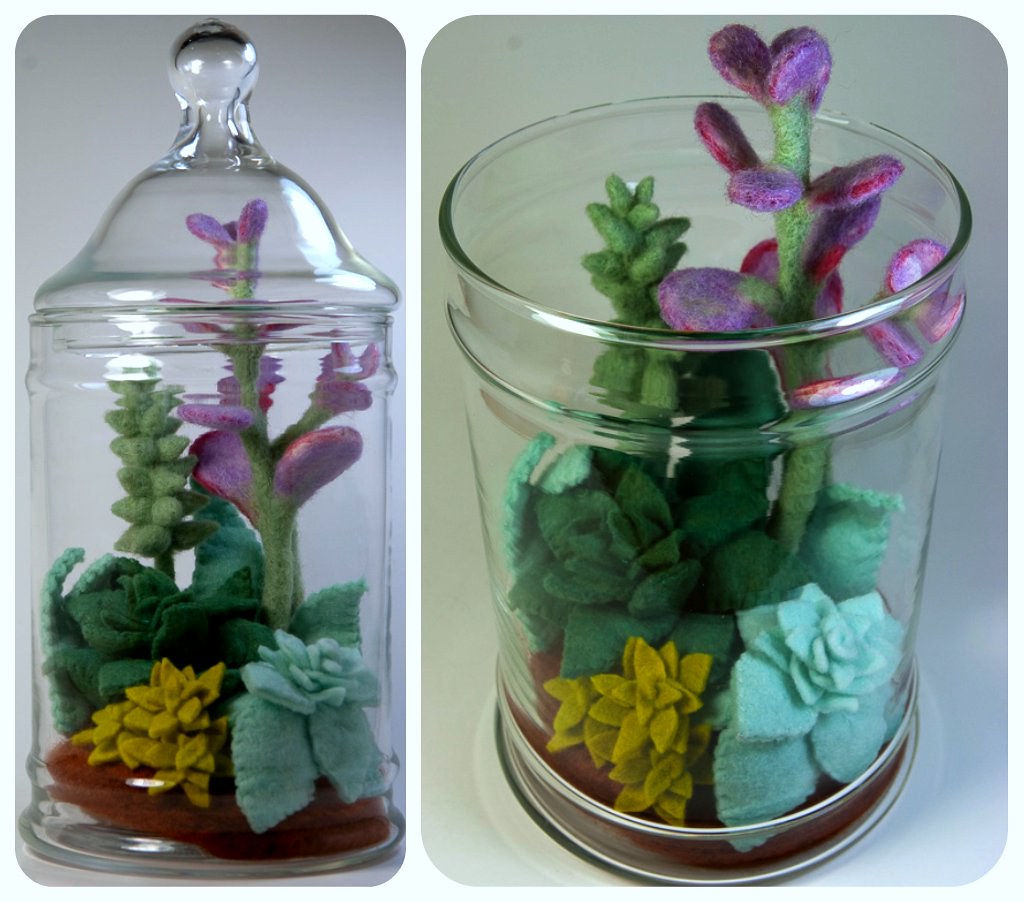
Ever since I made my first felt terrarium I have searching my local thrift stores for the perfect glass containers so I can make some more. This week scroungers luck was with me and I now have 4 glass terrariums waiting to be turned into special little microcosms! It is snowing outside and I am thinking of summer, so I decided to make my terrarium out of felted versions of sun-loving succulents. I love the colours and shapes and I wish I had a patio where I could expand my collection - have you seen Geninne's? I am so jealous.

Succulents really lend themselves to being made from felt because their leaves have a natural "plush" look to them and the wool seems to take on their soft palette of greens and blues easily.

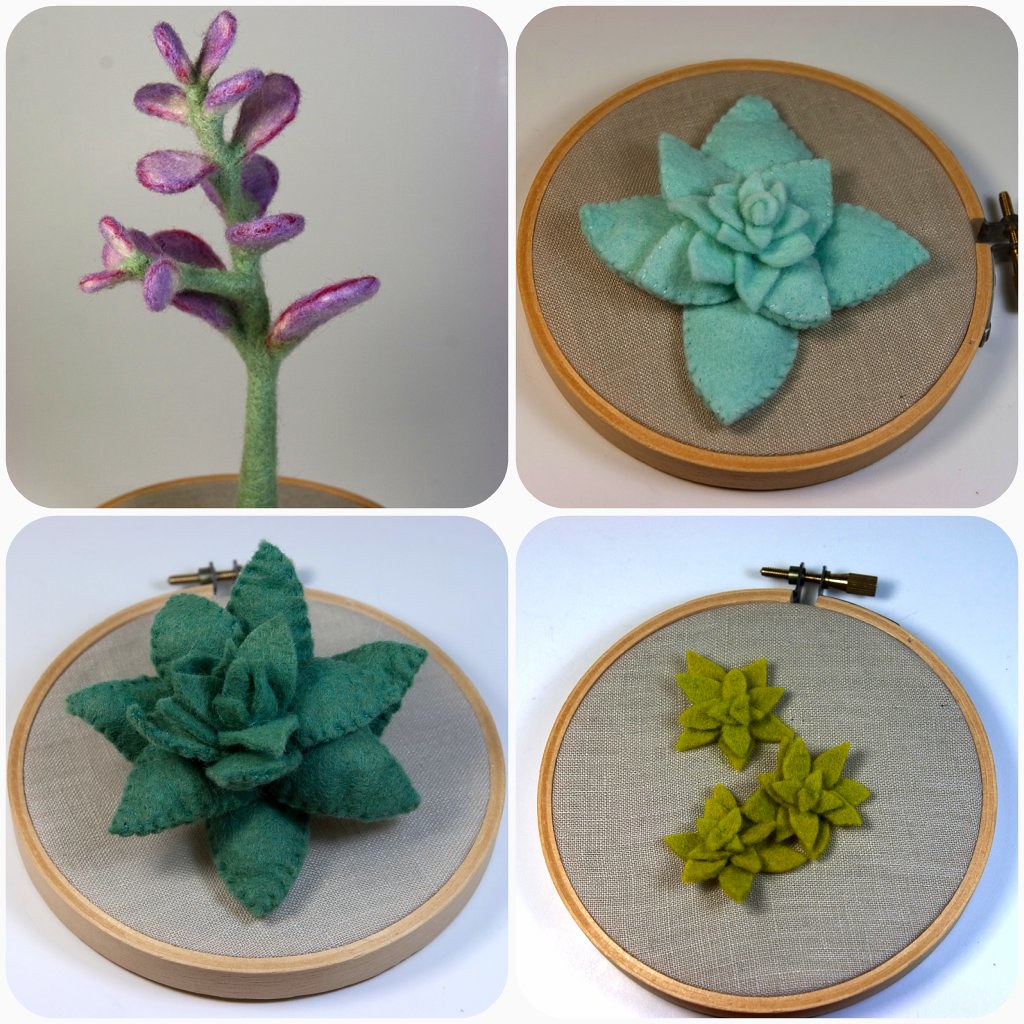
Because the beautiful colours of these plants was such a big part of my inspiration, I have to admit to being really fussy about colour with this project. I hand-dyed the sheets of wool felt, starting with either cream or white, to get different grades of blue-greens. To achieve the yellow-green of the tiny filler plants in the front of the terrarium I over-dyed very light blue-green felt with natural turmeric (handy tutorial from Lion Brand for dying wool with turmeric). For the jade plant, I layered wisps of wool roving in white, light green, bright magenta and soft lavender, in order to get the leaves just right.

I knew I would have to make some tall succulent plants in order to make my terrarium look full. I decided that I would start with a jade plant, as I had a real plant in my living room to study. After searching the internet, I think I may actually be the first person crazy enough to needle-felt a jade plant. Trust me to make an everlasting version of a plant that already is drought resistant and impossible to kill! It is made with a pipe cleaner armature. I needle-felted a smooth stalk and smaller side branch around the pipe cleaner in light green wool. The leaves were attached to the stalk, alternating directions with each pair. Oh, did I mention, I also stabbed myself about a hundred times? I need to figure out a better way to felt the edges of thin leaves that doesn't involve sandwiching my barbed needle between my fingers.
The "Hens and Chicks" type succulents were made almost the way you would make a rose. I started with a small cone of needle felted wool, and then built the plant around this, starting with the smallest leaves and adding larger and larger leaves. The outermost layers are not only double felt, but stuffed with wool roving. I also made a second tall succulent with many cone-shaped leaves, some tiny filler plants, as well as some large curling leaves that I used for the background. Everything was arranged and sewn down to a terracotta-coloured needle felted base.

I also discovered a new (probably only new to me) stitch for sewing together two layers of felt; I am going to call it "Shoelace" stitch, because that is how I sew it.
**Update: I have moved the description for the Shoelace stitch to its own mini-tutorial here.

Sunday, February 13, 2011

Valentines Day Craftbook Challenge Fail

Check out this cute little frog! A dear reader, Raquel, made him following my instructions for the felt owl measuring tape and was kind enough to send me a photo of him. He is so great, good job Raquel. (I really love getting this kind of mail, if anyone out there completes any of my projects, please please please send me a photo!)

I want to thank you all again for entering the giveaway, your kind comments were overwhelming as always. Congratulations to the the winners! Gem of GemmaJoy, from Brisbane Australia, and Kristin of Kleas, from Minneapolis MN, your keychain clutches and earrings are in the mail. You both have lovely blogs and I am so happy that the randomizer picked you :)
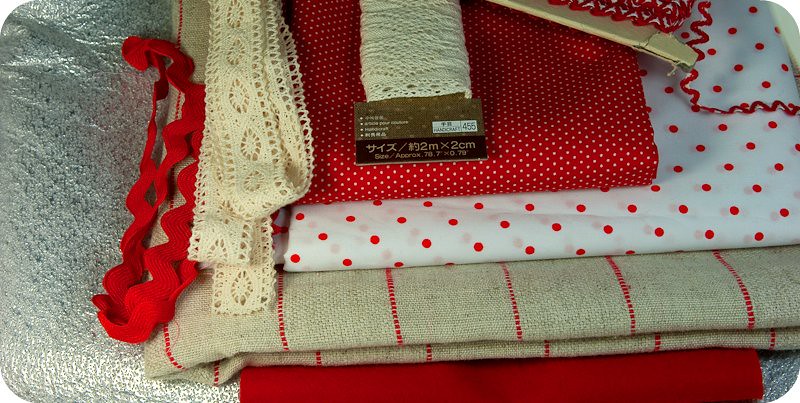
So I had this fabulous idea to make myself some cute zakka-style oven mitts for Valentines Day. I don't even have plain-old regular oven mitts and I burn myself every time I try to take something out of the oven so I was pretty excited about this project. I gathered up my materials: some pretty vintage cotton rickrack and Japanese crochet lace trim, some linen-esque fabric with a cute red stripe pattern, pretty red and white dot lining and some space age silvery batting. And to make my project over the top, cross stitched little fawns from the wonderful book, A Rainbow of Stitches, by Agnes Delage-Calvet, Anne Sohier-Fournel, Muriel Brunet, and Francoise Ritz. 

How can this go wrong I ask you? OK, on to the FAIL part of my Valentines Day Craft Book Challenge project...
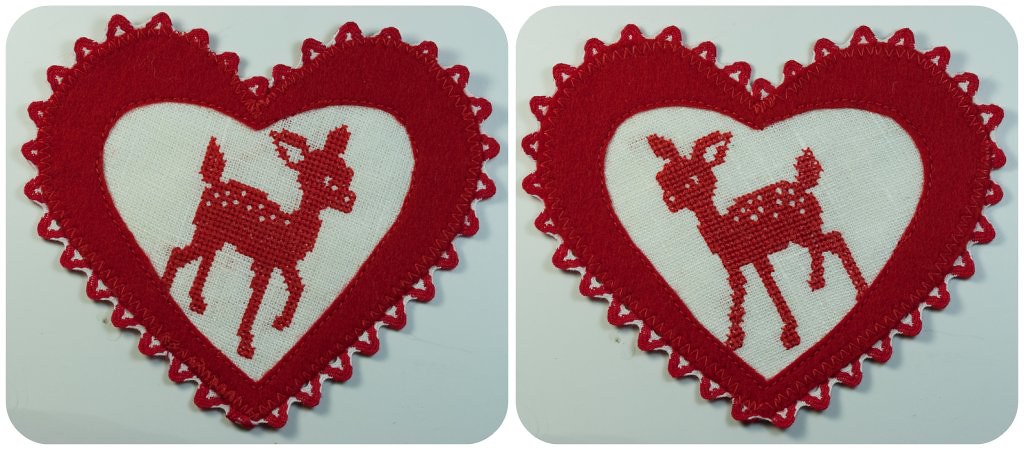
Do you see what I see? Maybe we need to do a little closeup: 

Is it just me, or does that little fawn look, sort of, well, Grinchy? I think it isn't just me. These little fawns are evil twins. I can't have them on my oven mitts. They look like they might burn me with their disapproving stares. Really, I don't know how I didn't notice this until I had appliqued the little red hearts and rick rack around each of them.

I think maybe it is just one of those problems that eyes are so dang expressive, and my little half-stitch is somehow making the deer all squinty and mean, and if you tried this, your half-stitch would make the deer look sad, or happy, or confused etc...

The project picture of these little fawns in the book look decidedly sweet, which is why I chose them in the first place:
So what am I going to do with these little hearts? Should I make them into snarky anti-valentines? Give them to someone nearsighted? Carefully unpick all the stitches and burn them so they can't come alive at night and do the bidding of an evil overlord? (perhaps I have watched too much science fiction)

Happy Valentines Day everyone! Tell a friend how much you care about them.